-40%
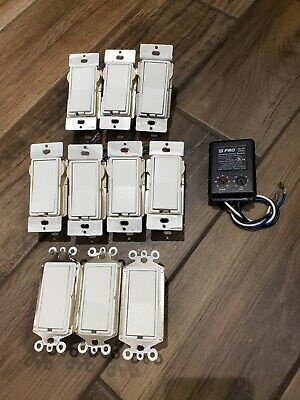
LOT OF 7 X10 WS12A Dimmer Switch + 3 XPSS Companion switch + bonus XPDF Dimmer
$ 15.83
- Description
- Size Guide
Description
LOT OF 7 X10 WS12A Dimmer Switch + 3 XPSS Companion switch + bonus XPDF Dimmerpulled from working environment - functional. Decommissioning system to sell house.
additional shipping for remote locations; email me before bidding.
Specs pulled from Google:
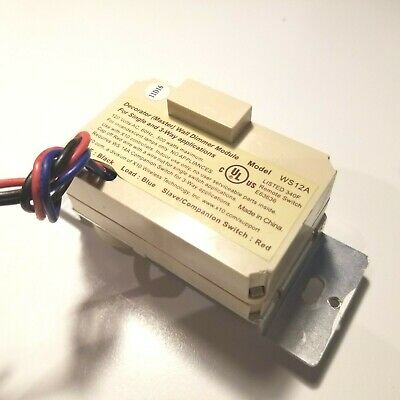
The WS12A is a simple Decorator Wall Switch. It has an elegant decorator design that looks great in any decorator style switch cover. The switch also dims locally and remotely. The switch also has a Resume Dimming function which enables your lights to remember their last set dimming level and turn on and off to that same level.
The switch also comes with the Soft Start feature. This feature eliminates the sudden brightness and harsh adjustment of the sudden brightness of turning on the lights. The Soft Start Feature creates a smooth transition from Off to On by ramping up power to the unit over a 2 second period. This creates a pleasant and high class look to your home lighting.
This switch allows for control and dimming both locally and remotely with any X10 Controller.
NOTE: The WS12A Decorator Dimmer Switch works with incandescent bulbs and some dimmable alternative lighting (ie dimmable LED/Fluorescent).
Due to the dimming capabilities and Soft Start feature that ramps up the brightness, if you have alternative lighting, a
WS13A On/Off Relay Switch
may be more appropriate.
What are the advantages of using the WS12A Wall Switch?
The WS12A comes with the following benefits:
Home Automation Capabilities and timed Events
Allow Remote functioning and dimming of the Light with any X10 Controller
Dimming Capabilities
X10 Product No.:
WS12A
Whats Included:
(1) X10 Decorator Dimmer Switch (WS12A/RWS17)
Compatibility
X10 compatible
Wattage Load:
500 Watts maximum load, 40 Watts minimum
Compatible Load Type:
Incandescent only
Power Rating:
120VAC/60Hz
The WS12A Wall Dimmer is designed to control incandescent loads with a rating of between 40W and 500W. Lamps rated below 40W
may fl icker or operate erratically. The switch can replace a single switch that controls a ceiling light or outside light. It can also be used
where two switches control the same light (3-way). In this case a Companion Switch (WS14A) is required and is sold separately. A
push-button is provided on each switch for local on/off control and local dimming. (See WS14A instructions for 4-way applications).
WARNING: Wall Dimmer Modules must not be used to control appliances or fl uorescent lamps.
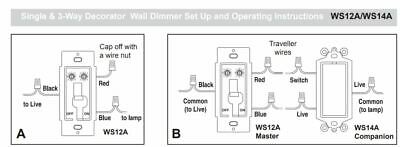
Installing the Wall Dimmer Module (single switch applications, diagram A)
• Disconnect the power at the circuit breaker panel.
• Remove the wall plate and unscrew the existing switch from its box.
• Remove the two wires from the existing switch and connect them to the WS12As black and blue wires, using the wire nuts provided.
• Cap off the unused red wire with a wire nut (supplied). Make sure no bare whiskers of wire are protruding, use insulating tape to
cover wire nuts if necessary. Screw the switch into the wall box. Don't replace the wall plate yet.
Installing the Wall Dimmer Module (3-way applications, diagram B)
• Disconnect the power at the circuit breaker panel.
• Remove wall plates and unscrew the existing switches from their boxes. Identify the common wire at each existing switch (usually
connected to a different color terminal).
• Replace one of the existing wall switches with the WS12A Wall Dimmer (Master): connect the common wire to the black wire on the
WS12A using a wire nut. Connect the two remaining "traveller wires" to the red and blue wires on the WS12A, using wire nuts. If one
of the travellers is red connect it to the red wire on the WS12A.
• Replace the other existing wall switch with the WS14A Companion Switch (sold separately): Connect the traveller which you
connected to the red wire on the WS12A to the terminal labelled SWITCH on the WS14A. Connect the common wire to one of the
WS14A's terminals labelled LINE. Connect the remaining traveller wire to the second terminal labelled LINE on the WS14A. Screw
both switches into their wall boxes. Don't replace the wall plate yet.
Setting up and operating the Wall Dimmer Module
• Pop the rocker paddle off the WS12A (using a small screwdriver). Set the House Code dial to the same letter (A thru P) that you set
on your X10 controller(s).
• Set the Unit Code dial to an unused code (1 - 16) which can be controlled from any X10 controller.
• Set the power on-off slide switch (under the rocker paddle) to the ON (right) position. Turn this switch OFF (left) when changing a light
bulb. Replace the paddle.
• Refi t the wall plates on both switches.
• Turn the power back on at the circuit breaker panel.
• Press the paddle quickly to turn the module on and off. Press and hold to dim or brighten. Note: if you press the paddle and nothing
happens, you might have pressed it for too long and started to dim the light and not noticed that it dimmed.
• You can turn the module on and off and dim and brighten it remotely from any X10 Controller.
• The WS12A has soft start, meaning that when you turn it on it gradually ramps up from off to full brightness; and memory dim,
meaning it comes back on at the brightness level it was last at when you turned it off.
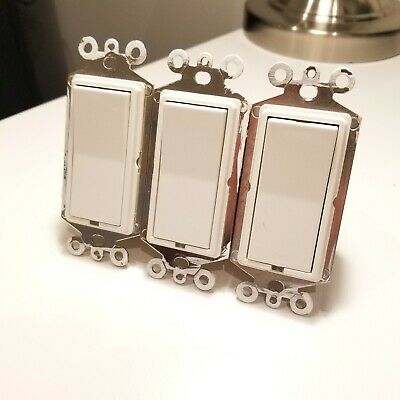
The XPSS X10 Pro Decorator Companion Wall Switch Module brings management of multiple wired-in, large appliances and light fixtures into your home X10 system. The switch replaces your standard wall switch or switches in both 3-way and 4-way set-ups, for complete local and remote X10 control of heaters, air conditioners, pool equipment and other high-power devices, as well as incandescent and non-incandescent light bulbs. It can either be paired with your current switch plate or one available at any local hardware or big box store. The XPSS Pro Companion Switch can be used in addition to the WS12A, XPD3, XPS3 and the XPDI3 switch modules in 3-way and 4-way applications.
This switch is a companion switch and it requires a WS12A, WS13A, RWS17, XPD3-IW, XPS3-IW, or XPDI3-IW master switch for operation.
X10 Product No.:
XPSS
Whats Included:
(1) Companion Dimmer Switch (XPSS)
Compatibility:
Use with X10 compatible transmitter and any standard toggle trim plate (each sold separately).
Power Load:
120V/AC @ 60W to 500W
Description: The XPSS Slave Switch works with the XPS3, XPD3 and XPDI3 Master Wall Switches to complete a 3 or 4-Way installation. The
XPSS sends a 120Volt pulse from its Switch Terminal to the Master Switch's Control Terminal via one traveler wire. Dimming can be performed
from either the XPSS or the Master Switch location as long as the load attached to the Master is dimmable, and you must use either of the XPDI3
or XPD3 Master Dimmer Switches. The Master Switches perform all the load control, the Slave simply tells the Master to turn ON/OFF or Brighten/
Dim as applicable to the installation.
Specific Requirements: 120VAC
Optional / Supplementary Devices & Modules:
XPS3 20A Wall Switch, XPDI3 Inductive Dimmer Wall Switch and XPD3 Incandescent Dimmer for existing 3 or 4-Way Installations.
Installation:
For specific wiring connections, see installation Instructions for XPS3 20A Wall Switch, XPDI3 Inductive Dimmer Wall Switch and
XPD3 Incandescent Dimmer Switch.
Note: The XPSS does NOT require any X10 Code Addresses, it is simply a Slave Switch to communicate to the Master Switch. All Address Codes
and Switching is performed on the Master Switch.
